Posted on Leave a comment

Pointed Quilt

IMG_4976 (3)Yay! My Pointed Quilt is done! I’ve been seeing a lot of quilts turned on-point and I thought it would be awesome to try to make one myself.

Paper Pattern
Digital Download (USA)
Digital Download (International)

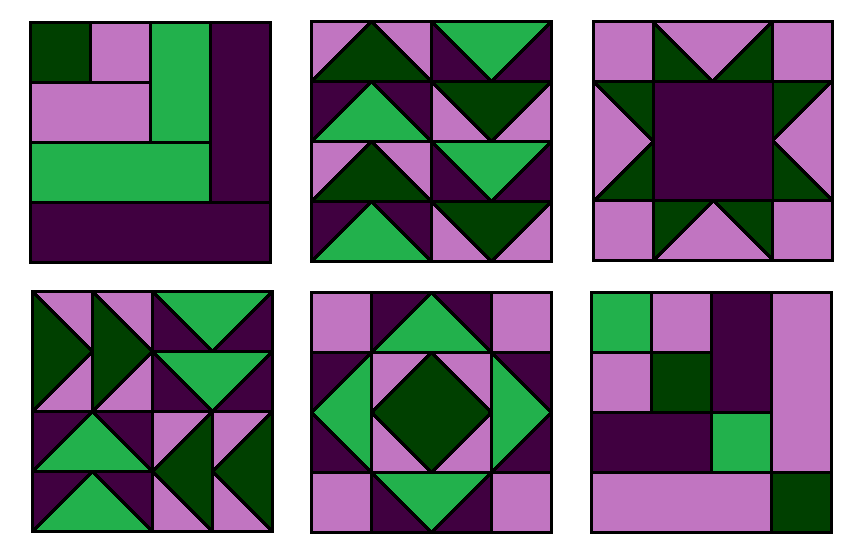
I was trying to design a block that was Fat Quarter friendly. This block is similar to my block 7 of the Snowy Day Quilt Sampler. The block in my Pointed quilt is a little smaller and turned on-point!

Since this block uses different size pieces through out, you must make sure to use an accurate scant 1/4 inch seam. This will ensure that all of your pieces line up correctly.

You can make sure you are using a scant 1/4 inch seam by taking 3 –  2 1/2 x 4 inch strips. Sew them all together lengthwise. The center strip will measure 2 inches wide finished, if you are using a scant 1/4 inch seam.

scant fourth inch

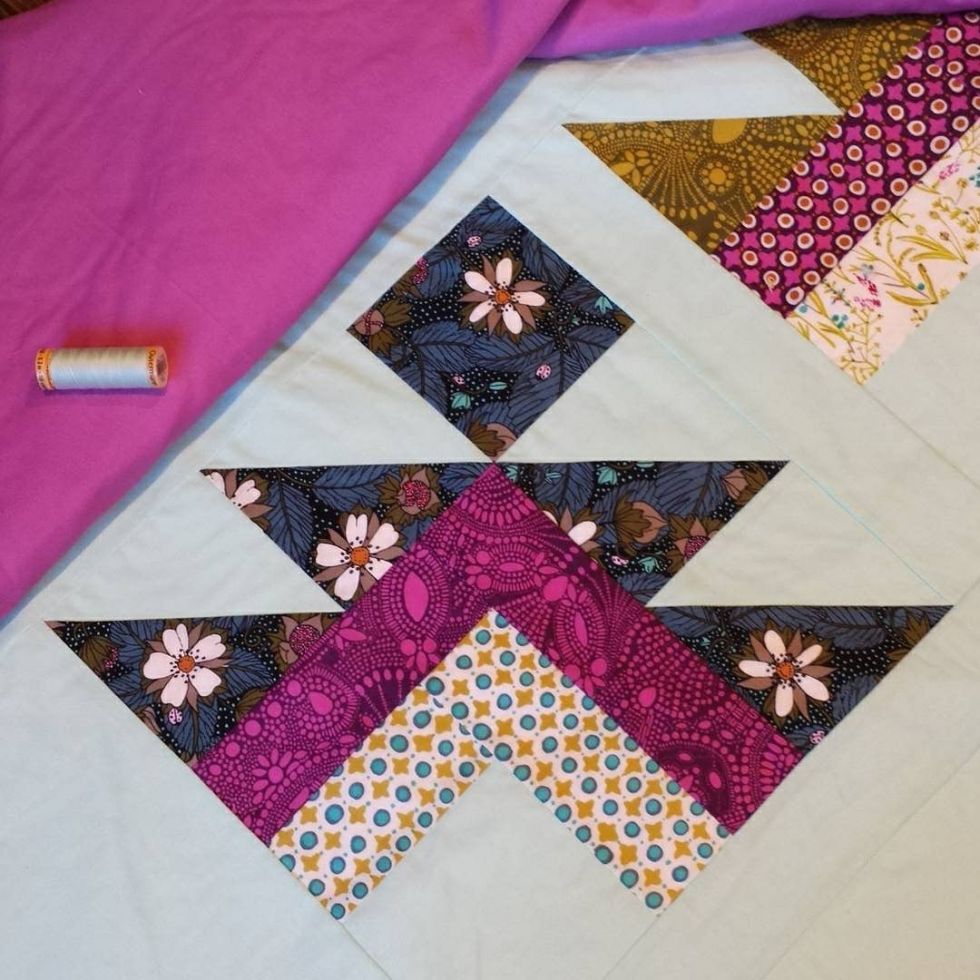
I have been trying to decide on a pattern to use this beautiful Garden Secrets fabric by Sarah Watson for Cloud9 Fabrics. After I drew up my pattern I thought this fabric line would be perfect.

The math for a on-point quilt is a little different than a regular quilt. Once I got my mind wrapped around the idea. It was go time! The quilt goes together pretty quickly.

pointed quilt andrea 2

Once my quilt was all finished I decided to go with a beautiful purple backing fabric. This fabric is Kona Cotton in Gumdrop by Robert Kaufman. I like to use my Kona Color chart to pick out the perfect shade of fabric.

I also found the perfect shade of Cotton Gutterman thread that matches the Ice Frappe Background fabric.

pointed quilt andrea

I decided to quilt this to mimic the points. I usually opt for a straight line quilting, which is much faster. This one took more time, but was totally worth it. I love how it turned out!

IMG_4980 (3)

In an effort to use up my stash, I decided to go with a scrappy binding! I used two fat quarters of the dash print and some scraps of a couple of the other light colored fabrics.20171007_154017

You can download the pattern today!!

PAPER PATTERN

Make sure to use the hashtag #pointedquilt

Happy Quilting!
Andrea

Here are some made by my awesome testers!!

marg sharpe for listingBrittany listing

Cindy (2) listingcindy price kelley (2) listingRoseMassey (2) listingVickie Riches (2) listing

Posted on Leave a comment

Lets Make Some Pot Holders…Free Tutorial


IMG_4807 (2)If you love to sew and quilt like I do,  you end up with a bunch of scraps! Well, I know what you can do with all those scraps, make some pot holders! Pot holders are a great way to use up fabric scraps and cotton batting scraps. It’s a great weekend project. They make great house warming gifts or hostess gifts too.

I like to make my pot holders with a layer of Insula-bright (insulated batting that makes them heat resistant) and a layer of cotton batting (for extra protection and to absorb any moisture). When you make pot holders you want to make sure all of your supplies (thread, fabric, and batting) are 100% Cotton. If you use polyester fabric, and they catch fire, the fabric would melt. If cotton fabric catches fire it will just smolder.

Supplies needed:

1 – 8 1/2 x 8 1/2 inch quilt block made of Cotton Fabric

(Strip Block shown below: 4 – 2 1/2 x 9 inch strips)

1 – 10 x 10 inch  piece of Cotton batting

1 – 10 x 10 inch piece of  Insula-bright (Insulated Batting)

1 – 10 x 10 inch piece of  Cotton Fabric

1 – 3 inch x width of fabric (typically 42 inches)

(if you prefer a thinner binding, use a 2 1/2 inch strip)

pot holder 2

First you will need to make your 8 1/2 x 8 1/2 inch quilt block (unfinished size). So you can pick your favorite 8 inch finished quilt block or you can use this super easy Strip block.

Strip Block

Take your 4 – 2 1/2 x 9 inch strips. With right sides of fabric facing each other, sew your strips together to for a block. Press your seams to one side. Then trim your block to measure 8 1/2 x 8 1/2 inches.

Now it’s time to make our Pot Holder!

We will now make our mini quilt sandwich. First lay down your 10 x 10 inch backing fabric down wrong side face up.

Then place your 10 x 10 inch piece of Insula-bright down

Then place your 10 x 10 inch piece of Cotton Batting down

Then place your 8 1/2 x 8 1/2 inch quilt block on top. Pin in place.

pot holder 6

Quilt all four layers together. I like to quilt 1/4 inch from the seams

pot holder 7

Trim down to 8 1/2 x 8 1/2 inches. Sometimes it will end up slightly smaller about 8 1/4 x 8 1/4 inches due to quilting the puffy layers.

pot holder 8

Now you will take your 3 inch x width of fabric strip (about 42 inches). I prefer a large binding on my pot holder. If you want a thinner binding, you can use a 2 1/2 inch wide strip.  On one end fold in about 1 inch. Press wrong sides facing each other. Then fold fabric in half lengthwise,  wrong sides together and press flat.

Match up raw sides of the binding to the raw sides of the front of the pot holder. Take the binding end with the folded over edge, place it on the center of one of the sides. Start sewing your binding on to the front of the pot holder about 1 inch in, use a 3/8 inch seam allowance. Stop when you are 3/8 inch from the corner, backstitch. If your block has points, you may want to use a 1/4 inch seam allowance, so you don’t cut off your points.

Fold your binding up, lining up with the side of your pot holder, then fold it down to line up with the side of your quilt.

Start sewing 3/8 inch from the edge.  When you have reached the beginning point, trim to correct length,  tuck the end of the binding under the beginning of the binding, sew down.

Fold over binding and hand sew to the back or machine sew to the back. I prefer hand sewing my binding, just because I haven’t mastered machine sewing it. Also, it’s nice to have some hand sewing when I’m watching shows.

pot holders finisihing


Yay you have a pretty new pot holder for yourself or a nice gift for a friend! I’d love to see the pot holder you make! Use this hashtag on Instagram: #hccpotholder

Happy Sewing!!
Andrea


Posted on 3 Comments

Happy Flower Garden Quilt

IMG_4455 (2)

Digital Pattern (USA)
Digital Pattern (International)

Who loves flowers? Well, I love flowers, but I do NOT have a green thumb. Even though I should have a green thumb. I took Horticulture and Landscaping classes in High School. I know what I’m supposed to do, but I’d rather be inside sewing. I know it sounds bad, but it is true.

When I started designing my Happy Flower Garden Quilt, it was actually a totally different design. And then I though ‘Hey, that looks like the top of a flower’. So I took that shape and made it into some tulip looking blocks. Since I love flowers so much, I thought this would be the perfect quilt for myself! I’ve been wanting to make myself a quilt for awhile, I just hadn’t picked the right pattern yet.
I have been hoarding some Macramé Fabric by Rashida Coleman-Hale for Cotton + Steel Fabrics. I thought this would be the perfect time to use some of this gorgeous fabric.

IMG_4344 (3)

I love how it turned out and am happy I finally cut into this beautiful fabric. I decided to go with a wavy line quilting. I usually go with straight line quilting. First I drew a wavy line from the top to the bottom of my quilt with a water soluble fabric marker. Then I started quilting from the top to the bottom of the quilt. I adjusted my walking foot guide to 1 inch and went along my first quilting wave. It’s not perfect, but I love it! One of my favorite parts is the bright pink backing!

IMG_4353

So if you like flowers too, then this quilt pattern is perfect for you too! It comes with directions for a baby/crib size and throw size quilt. This pattern is great for the adventurous beginner to intermediate. It has a lot of different pieces so keeping organized is key. I like to write my sizes on a little piece of paper and pin it to the stack of corresponding pieces.

IMG_4362

When I tested out my Baby Size quilt I decided to go for a floral sashing! I love this June Bug fabric by Dear Stella Fabric! I can’t wait to finish this one!

IMG_20170530_132757_548

This would be a great quilt to make for a new summer baby or a throw size for a graduate!

You can get your copy of the pattern here:
Digital Pattern (USA)
Digital Pattern (International)

Happy Quilting!
Andrea

Find this Baby size quilt in my shop:

IMG_8026 (2).JPG

Posted on Leave a comment

The Beauty of Solids

IMG_4364 (2)
Let me tell you a secret. I used to think Solid colored fabric was SO boring!!! I never purchased solids for my quilts or projects. I’d use a dot fabric or a fabric with a white on white pattern.

And then I joined Instagram. I saw all these gorgeous quilts that had solids in them! They looked so balanced, not too busy and so so pretty!

So I decided I’d go out of my comfort zone and make an all solids quilt! Yes ALL solids!! Crazy huh! I found the perfect pattern, a Tetris quilt for my husband. I loved how it turned out so much! The Kona Cotton fabric by Robert Kaufman is so vibrant!

Tetris Quilt

Solids can help balance out your quilt and showcase the block designs. If you have too many busy prints the design can get lost.

So I had some left over solids from my Tetris quilt and I decided to test out my Stepping Stone Quilt pattern with the solids too. I love how it turned out too!

IMG_4767 (2)

I bound it with a Black with White dash fabric called Thicket by Gingiber for Moda and the backing fabric is made by Riley Blake. This quilt is listed for sale in my Etsy shop here.


IMG_3309

Then I saw this awesome fabric from Arrow Flight by  Michael Miller fabric and got inspired to make the front of my quilt mimic the backing fabric.

IMG_3996

So I came up with my super easy Colorful tiles quilt pattern.

colorful tiles quilt

This Colorful tiles quilt is also listed for sale in my Etsy shop here.

I used the Kona Cotton by Robert Kaufman Color chart to help pick some of the solids for the front of this quilt.

color chart

This color charts is super awesome! It’s great for picking out backing fabric and coordinating solids. You can buy one online from a variety of quilt fabric shops. What’s also cool, is this color chart matches up with all of the Kona Cotton fabric sold a Joann Fabric Stores online and in store

If an all solids quilt isn’t for you. You can try to mix more solids in with your quilt to help the pattern pop. Like in my X Marks the spot quilt. The white fabric makes the design pop. You can find the pattern here.

IMG_4742 (2)

So if you haven’t made an ALL solids go try it!! Or at least try adding some solids to your next quilt, I’m sure you will love it!!

Happy Quilting!
Andrea

Posted on 7 Comments

Happy Cloud Quilted Pot Holder Quilt Along

Quilted Pot Holders

This post may contain Affiliate Links. When using the link, you pay the same amount for the items, I just receive a small commission. 

If you like to sew or quilt, I know you have lots of fabric scraps! I know I sure do! So I thought it would be fun to run a Free Quilted Pot Holder Block Quilt-a-long with you all! Yay! You can download the Full length pattern here:

DOWNLOAD HERE: Happy Cloud Quilted Pot Holders Pattern

Each block is a basic design that would look great as a pot holder. If you are not interested in making pot holders, you can still join in! You can use your 8 1/2 inch unfinished blocks in a quilt. You could make a couple throw pillows. Or whatever your heart desires.

The first week you will receive the fabric requirements if you would like to complete all of your pot holders with the same fabric. Each 8 1/2 inch unfinished block requires a small amount of fabric, this would be a great way to use up some scrap. You will also receive directions how to assemble your pot holders (binding method and a non binding method). So by the end of the quilt-a-long you will have 6 pot holders (or 6 sets if you do two pot holders a week). These are a great way to freshen up your kitchen. They also make great gifts!

When picking out your fabrics and thread, make sure to only use 100% Cotton!! If you use polyester it will melt if it catches fire. If you use Cotton it will just smolder.

The Fabric requirements are for ONE of each block (6 pot holder total). If you would like to make sets (2 of each block) DOUBLE the fabric amounts.

You can also join my Happy Cloud Quilted Pot Holder Quilt-a-long Group on Facebook to share all of your fabric choices, progress and  pretty finished blocks and what you decided to make them into!

Click Here

Happy Quilting!!

Andrea

Quilt Along Schedule
Oct. 27, 2017 – Week 1 – Fabric requirements and Pot Holder construction directions
Nov 7, 2017 – Week 2 –  Block 1 – Modified Log Cabin
Nov. 14, 2017  – Week 3 – Block 2 – Flying Geese
Nov. 21, 2017 –  Week 4 – Block 3 – Sawtooth Star
Nov. 28, 2017 – Week 5 – Block 4 – Crazy Flying Geese
Dec. 5, 2017 – Week 6 – Block 5 – Diamond in Diamond
Dec. 12, 2017 – Week 7 – Block 6 – Stepping Stone

Â