Posted on 6 Comments

Aloha Ripple QAL – Week 3: Half Square Triangles!

IMG_5401

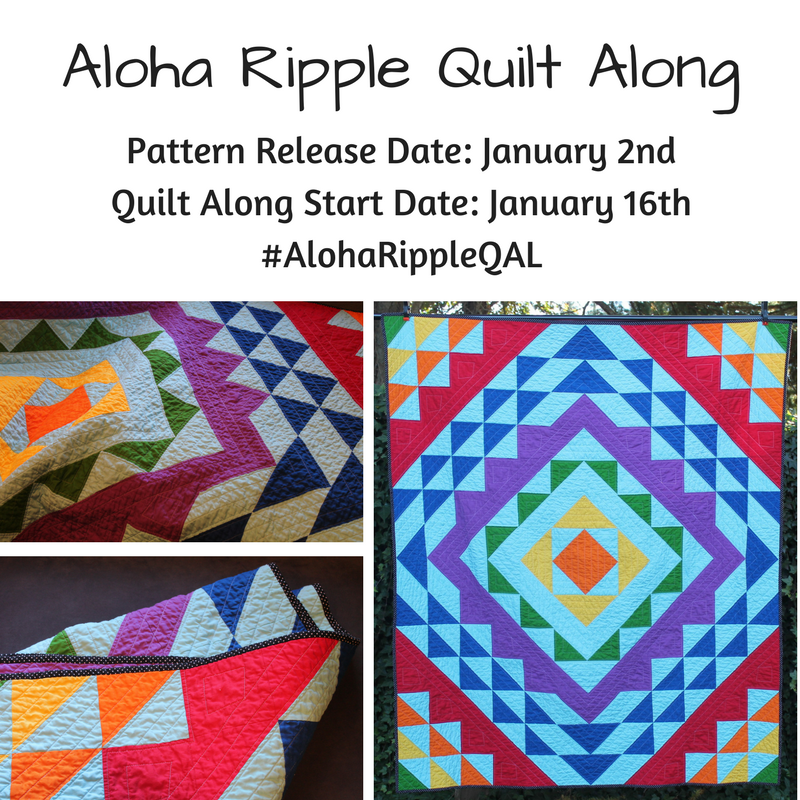
Welcome to week 3 of our Aloha Ripple Quilt Along!!  This week we will be making lots and lots of half square triangles. (Download Pattern)

I love how versatile half square triangles are! You can make so many pretty designs using this basic block.

I like to make my Half Square Triangles with the 2 at 1 time method. If you have a different method you prefer, go for it! I like this method because all your finished edges will be straight grain and not on the bias.

To make the HST 2 at a time, I add 1 1/4 inch to the finished size HST. So our finished throw size HST will be 5 inches finished, so 5 + 1 1/4= 6 1/4 inches.
I like to give you plenty of wiggle room for when you are trimming your HST down to the correct size.

All of the 6 1/4 inch Main color squares will match up with 1 Background color square of the same size. (See the Aloha Ripple Quilt Pattern for amounts).

With right sides of fabric facing each other, lay one square on top of the other. Draw a line from one corner to the other diagonally. You will then sew a scant 1/4 from the seam on both sides. (Since this size square gives you plenty of wiggle room a regular 1/4 seam would work, I have you sewing a scant 1/4 inch seam, so the whole pattern is consistent.)
Cut down the center, Set your seams with your iron, finger press them open and then press open. SEE BELOW.
IMPORTANT – You will need to then trim down all of your half square triangles to the correct size. The throw size will be 5 1/2 inches. You will want to make sure to line your center seam up with the 45 degree angle on your ruler to insure that your points line up when sewing.

Since trimming the half square triangles can take a long time, next week we will have a super quick and easy block! You can start trimming the HST’s this week and finish trimming the remaining ones next week.

LIVE VIDEO: Join me today (Tuesday Jan 30th) at 10:15 am PST (West Coast USA) for a LIVE video in the Facebook Group to go over tips and answer any questions.

Make sure to share a photo of this weeks step on social media with the hashtag #AlohaRippleQAL or join the Facebook Group and post a photo of all your half square triangles!

Join the Facebook Group

Download Pattern

Next week we will make our first block, the Center Block!

Here is the full Quilt Along Schedule:

Starting January 2nd: Download Pattern – Select your fabric and post a photo!
Week 1: January 16th: Cut fabric
Week 2: January 23rd: Make the Flying Geese
Week 3: January 30th: Make the Half Square Triangles
Week 4: February 6th: Make the Center Block (1)
Week 5: February 13th: Make Corner Blocks A (2)
Week 6: February 20th: Make Corner Blocks B (2)
Week 7: February 27th: Make the Stacked Flying Geese blocks (4)
Week 8: March 6th: Assemble your Quilt Top
Week 9: March 13th: Baste, Quilt and Bind your Quilt!

Happy Quilting!
Andrea

Posted on 10 Comments

Aloha Ripple QAL – Week 2: Flying Geese

IMG_5389 (2)

Week 2 of the Aloha Ripple Quilt Along! (Download Pattern)

Now that we have all our pieces cut, it’s time to start making our units! This week we will be making Flying Geese units.

When I started out quilting, I was very nervous about make the Flying Geese unit, so I would opt to use two half square triangles and sew them together instead.
The benefit to using a Flying Geese, is that you don’t have a seam down the middle of your pretty fabric! Less seams equals less sewing! Each time you make them they get easier and easier.

For the Aloha Ripple Quilt we will be using both the 4 at 1 time No Waste Method and the 1 at a time method. See pattern for full directions.

Tips for flying geese:
Go slow when sewing for accurate seams.
Finger press your seams open before using your iron.
Press seams without steam if possible (Dry iron)

Flying Geese – 4 at 1 time No Waste Method

When you are making the Flying Geese with the 4 at 1 time no waste method, you will need 1 large Square and 4 little squares.

Large Square = the width of your finished geese + 1 1/4 inch
Small Squares = the height of your finished geese + 7/8 inch

So for example in this pattern the throw size quilt will have a Finished size geese that is 5 x 10 inches (unfinished 5 1/2 x 10 1/2 inches)
So we will need:
1 Large Square: 10 + 1 1/4 = 11 1/4 inch
4 Small Squares: 5 + 7/8 = 5 7/8 inch

Take your large square and 2 small squares.
With right sides of fabric facing each other, l
ay the two small squares on opposite corners.
Draw a line from one corner to the other diagonally. Pin in place.
Sew a scant 1/4 inch from the drawn line on both sides. A scant 1/4 inch seam is a 1/4 inch that includes the width of your needle/thread. Some 1/4 inch feet will give you this.
Cut down the center line. Press seam to the attached triangles. 

Lay 1 small square down on the corner, right sides of fabric facing each other.
Draw a line from one corner to the other diagonally.
Sew a scant 1/4 inch from your drawn line. Cut down the center and press toward the small triangles. I find these flying geese to be pretty accurate and only need a tiny bit of trimming.

Flying Geese – 1 at a Time Method

Take your (5 1/2 x 10 1/2 inch for throw) rectangle, lay 1 (5 1/2 x 5 1/2 inch) square on top with right sides of fabric together.

Draw a diagonal line from one corner to the other. Stitch one thread width to the outside of the drawn line. You will want to butt your needle up to the outside of your drawn line when you are sewing (see the red line in the diagram). Cut 1/4 inch from your sewn line as shown below. Press toward the attached triangle.
You will attach the second small square to the other side with the same method. Press to the attached triangle. Trim if needed.

oneflyinggeese

I hope you get the hang of making these flying geese units! They are a lot of fun to make and the design possibilities are endless!

Join me today (Tuesday Jan 23 rd) at 10:15 am PST (West Coast USA) for a LIVE video in the Facebook Group to go over tips and answer any questions.

Make sure to share a photo of this weeks step on social media with the hashtag #AlohaRippleQAL or join the Facebook Group and post a photo of all your flying geese!

Join the Facebook Group

Next week we will be making our Half Square Triangles!

Here is the full Quilt Along Schedule:

Starting January 2nd: Download Pattern – Select your fabric and post a photo!
Week 1: January 16th: Cut fabric
Week 2: January 23rd: Make the Flying Geese
Week 3: January 30th: Make the Half Square Triangles
Week 4: February 6th: Make the Center Block (1)
Week 5: February 13th: Make Corner Blocks A (2)
Week 6: February 20th: Make Corner Blocks B (2)
Week 7: February 27th: Make the Stacked Flying Geese blocks (4)
Week 8: March 6th: Assemble your Quilt Top
Week 9: March 13th: Baste, Quilt and Bind your Quilt!

Happy Quilting!
Andrea

Posted on 1 Comment

Dye Your Own Multi-Color Yarn!

IMG_5524 (2)

This post may contain affiliate links. I may receive commissions from purchases made through links in this post. 

I follow a lot of indie yarn dye artists on Instagram. They have such a pretty variety of yarn. One’s you can not find at the big box stores. Not that I don’t have enough hobbies, I thought it would be fun to try to dye some yarn. I know that mine won’t turn out as pretty as all those dye artist’s I follow, but it would still be a super fun project.

I had been searching online for some kid-safe dying options. I found some great tutorials that use Kool-Aid or Food dye! These are a few of my favorites:

Chemknits

Smart Dying by Chalklegs Life Handmade

How to dye multi-color skeins with Kool-Aid by FreshStitches

How to Dye Speckled Yarn by Fiber Artsy & Crafts

IMG_5496 (2)Things you will need:
*Gloves
*Spoon/Chopstick/Plastic Straw (something to stir your dye)
*Wool Yarn (Acrylic or Cotton won’t work with this method)
*Kool-Aid (sugar free packs) or Food Coloring with White Vinegar or Citric Acid
*1/3 cup measuring cup
*Glass 9 x 11 or 11 x 13 pan (I preferred the larger one)
*Oven

Wool Yarn – I bought some Bare Wool yarn from Knit Picks. They have a great selection. I love knitting with bulky yarn, so I went with the Bare Wool of the Andes yarn. Knit Picks now has this in a Superwash version.  I have also purchased yarn at Dyers Suppliers. This yarn was very reasonably priced. You can save 20% OFF at Dyer Supplier with my link!

Dye with Acid –  I used some Kid Friendly Kool-Aid and Food Coloring. These are obviously non-toxic and safe for kids. If you are using Food Coloring you will need some Acid to help the color bond to the yarn. So I bought some White Vinegar. I used about 1/3 of a cup for each pan when soaking. Then I added a little more right before it went in the oven. (You can also use a couple table spoons of citric acid)

Most of the tutorials mention that you want to be careful with agitation & heat. You don’t want to have a drastic heat change. Also the agitation could cause your yarn to felt. So some slow swishing and pressing down is fine.

Soak Your Yarn – First we soaked our yarn in warm water and a little vinegar (about 1/3 of a cup in each pan or a couple tablespoons of citric acid) for 30 minutes. We pushed the yarn down in the warm water to make sure it was all soaked. If you are only using Kool-Aid, you don’t need the white vinegar. Kool-Aid has enough acid in it on it’s own. (But it probably wouldn’t hurt adding the vinegar.)

Drain Your Yarn – When it’s done soaking drain off most of the water, we left about 1/3  of the water in the dish. Leaving the yarn damp and a little bit of water in the bottom of the baking dishes (9 x 11 and 11 x 13 inch pans).
**Some of the tutorial’s I read removed all of the water from the pan and squeezed some of the water out of the yarn as well.

Add the Dye – We started with sprinkling Kool-aid, which end up in dumping it and a little tasting of the dry Kool-aid.  Snow went with a random colorful scheme. She also poured some of the food coloring water on her yarn too. Cloud’s color planning was more thought out. He did three stripes. Teal food color, Purple food Color and Green Food color. We mixed water and food coloring in a 1/3 of a cup measuring cup, then poured it on different sections of the yarn. This added to the amount of water in each pan. By the time we were done, the water level was to almost the top of the yarn.  I poked down the yarn with my gloved fingers to make sure the dye went all the way to the bottom of the yarn.

 Hearts from Cloud and Snow is being shy

Heat – After no white was showing we popped the yarn in the dishes in the oven at 350 degrees for 45 minutes. (I would try a lower heat next time for a longer amount, so you don’t risk burning the yarn) When the yarn comes out the surrounding water was clear.

We left the yarn on the counter so it could cool to room temperature. Once it was all cool, we drained the water and rinsed it in room temperature water. I added a little bit of shampoo to help remove the vinegar smell and rinsed it out.

Gently squeeze out most of the water and then we hung it on our drying rack.

Not bad for our first try! And the kid’s basically dyed it themselves (4 and almost 8 year olds). I love the color combos we ended up with. I helped a little with the pushing of it down so the dye went all the way to the bottom. During the drying we noticed we didn’t get all of the parts drenched with dye, so some white specks were showing. Which I loved the look of it. So If you don’t want any white you will want to make sure to add lots of dye and press to make sure it’s all absorbed. After the yarn has cooled to room temp you can add more dye and start the process over again.
Next time I will remember to put plastic on my counters. Thankfully the quarts counters don’t soak up much colors and I was able to wipe it off.

I’d love to see what color combo’s you come up with! When posting pictures on social media use the hashtag #hccdyeyarn or Tag me on Instagram @happycloudcreations or share a photo on my Facebook – Facebook.com/ShopHappyCloudCreations

Happy Yarn dying!
Andrea

*When the yarn was all dry some parts were a little lighter in color than when wet.
Since this was our first time dying yarn, I would recommend checking out the other tutorials above to see what method you like best.

I love how my kid’s hat’s turned out! I can’t wait to dye some more yarn! What would your favorite color combo be? Post in the comments!

IMG_5620 (2)


Posted on 11 Comments

Aloha Ripple Quilt Along – Week 1: Cut Fabric

IMG_5370 (2)

Welcome to the first week of the Aloha Ripple Quilt Along! Hopefully you have all your fabrics picked out and are ready to start cutting!

If you still need to download your FREE pattern click here!

Things you will need:

  • Rotary Cutter
  • Acrylic Ruler
  • Cutting Mat
  • Paper
  • Pen
  • Pins

When I make a quilt I like to cut all my pieces up front and label them to keep organized. Make sure you have a nice sharp blade for your Rotary cutter.

*Measure twice – Cut once*

I know everyone says it, but it’s true. You don’t want to rush your cutting and end up cutting your pieces too small.  You want to make sure you have plenty of fabric for the whole quilt.

When you cut out your pieces you will want to cut out the largest pieces first. Then cut the smaller pieces. This will ensure that you have enough fabric.

I like to take a little piece of paper and write the color and size on it and pin it to the stack of fabric. Since some of the sizes are very close, this helps me sew the correct pieces together.

Once they are all cut I like to stack them in a Gallon size Ziplock bag. That way I don’t loose any of my pieces.

IMG_5371 (2)

Make sure to read through ALL of the Basic instructions before starting your quilt. I’ve added instructions on how to test your scant 1/4 inch seam inside the basic instructions. Most quilt patterns require a scant 1/4 inch seam, they just don’t mention it. This 1/4 scant accounts for the little bit of fabric that is take up when you fold and press your seams open.

You will also want to look through the whole pattern to wrap the construction around your head before you start. You may need to cut your fabric differently if you want to make your flying geese or half square triangles with a different method than is listed in the pattern.

I like to go through all the steps and write in my color choices, so it’s less confusing when I get to those steps. You can also go through with a highlighter and mark the instructions for the size you are making, since the instructions are for baby, throw and queen size.

You could also tape pieces of your actual fabric to a pieces of paper and label it for reference.

Join me today at 10:15 am PST (West Coast USA) for a LIVE video in the Facebook Group to go over tips and answer any questions.

Make sure to share a photo of this weeks step on social media with the hashtag #AlohaRippleQAL or join the Facebook Group and post a photo!

Join the Facebook Group

Download Pattern

Next week we will be making our Flying Geese units! We will be using the 1 flying geese at a time method and the 4 at 1 time no waste method.

Here is the full Quilt Along Schedule:

Starting January 2nd: Download Pattern – Select your fabric and post a photo!
Week 1: January 16th: Cut fabric
Week 2: January 23rd: Make the Flying Geese
Week 3: January 30th: Make the Half Square Triangles
Week 4: February 6th: Make the Center Block (1)
Week 5: February 13th: Make Corner Blocks A (2)
Week 6: February 20th: Make Corner Blocks B (2)
Week 7: February 27th: Make the Stacked Flying Geese blocks (4)
Week 8: March 6th: Assemble your Quilt Top
Week 9: March 13th: Baste, Quilt and Bind your Quilt!

Happy Quilting!
Andrea

Posted on 12 Comments

Aloha Ripple Quilt Along

IMG_5047 (2)

Welcome to the Aloha Ripple Quilt Along!!

I’ve noticed most quilt alongs quilts consist of either sampler blocks or a bunch of the block. So I thought it would be fun to do something different! The Aloha Ripple quilt has a modern over all design, but it is still made with distinct blocks. The blocks are made up of squares, half square triangle and flying geese blocks. Each week we will have a new step of quilt. I will be posting a new blog post each week to go over that weeks step. I will also be filming a live video each week to go over the step and answer any questions in the Facebook Group.

This quilt is perfect for the adventurous beginner to intermediate quilter. It would look great in a variety of fabrics. I would recommend picking a contrasting fabric for the background, so the design pops. The pattern comes with directions for a Baby, Throw and Queen size quilt, so you can decide which size is perfect for you.

CLICK HERE TO DOWNLOAD Aloha Ripple Quilt Pattern

CLICK HERE TO DOWNLOAD King Size Aloha Ripple Quilt – Supplement Updated

Here is the Quilt along Schedule!

Starting January 2nd: Download Pattern – Select your fabric and post a photo!
Week 1: January 16th: Cut fabric
Week 2: January 23rd: Make the Flying Geese
Week 3: January 30th: Make the Half Square Triangles
Week 4: February 6th: Make the Center Block (1)
Week 5: February 13th: Make Corner Blocks A (2)
Week 6: February 20th: Make Corner Blocks B (2)
Week 7: February 27th: Make the Stacked Flying Geese blocks (4)
Week 8: March 6th: Assemble your Quilt Top
Week 9: March 13th: Baste, Quilt and Bind your Quilt!

I’m so excited to see all of your progress during this quilt along! Make sure to post your photo on social media with the hash tag #AlohaRippleQAL or post your photos in the Facebook Group!  CLICK HERE

My original Aloha Ripple Quilt was made for my parents-in-law for their anniversary. I thought they would like a bright and cheerful quilt. They both love visiting Hawaii and the quilt was made with Kona Cotton. So I decided to name the quilt Aloha Ripple!
I quilted the quilt in a straight line fashion mimicking the design. I bound it in a fun black and white dot fabric and backed it with the beautiful purple I used on the front.

Fabrics use in mine: Red, Orange, Canary, Grasshopper, Bahama Blue, Royal, Magenta and Pimatex Basics Pin Dot all by Robert Kaufman

My second Aloha Ripple quilt was a baby size quilt! I wanted to use up some of my stash so I found a bunch of solids that went great together!

If you couldn’t tell, I love Kona Cottons! These are: Grape mist, Aloe, Purrisan, Gumdrop, Ultra Marine, Noble Purple and Medium Grey

I found this awesome fabric from the Black and White Collection by Jennifer Sampou for Robert Kaufman Fabrics. I didn’t have enough of one fabric for the binding, so I decided to use them all!

I’m looking forward to seeing all of your fabric choices and the beautiful quilts you make!

Post your photo on social media with the hash tag #AlohaRippleQAL or post your photos in the Facebook Group!  CLICK HERE

Happy Quilting!
Andrea

Aloha Ripple Quilt Along insta