Welcome to week 4 of the Happy Flower Garden Quilt along! We are getting so close to making some flower blocks! Yay!
This week we will be making our Bottom Rectangle Blocks. Remember all those small square you cut out. Now it’s time to use them. These will give the bottom of our Tulip blocks a more rounded look.
This step will be super quick and easy, giving some extra time for people to catch up if they are a little behind.
Next week we will start making our blocks! Yay! I’m so excited to see everyone’s quilts come together!!
I will be filming a LIVE Video Tuesday May at 22nd 10:15 am PDT (West Coast USA) in the Facebook Group! I will be going over how to make the Bottom Rectangle Block and answering any questions you have. The video will be saved for later viewing.
May 1st – Week 1 – Cut your Fabric May 8th – Week 2 – Make your Half Square Triangles May 15th – Week 3 – Make your Flying Geese units
May 22nd – Week 4 – Make your Bottom Rectangle Blocks
May 29th – Week 5 – Make half of your Tulip Blocks
June 5th – Week 6 – Make the other half of your Tulip Blocks
June 12th – Week 7 – Make your Corner Tulip Blocks
June 19th – Week 8 – Make your Star Flower Blocks
June 26th – Week 9 – Add Sashing and Cornerstones (Finish Star Flower Blocks if needed)
July 3rd – Week 10 – Baste, Quilt and Bind
Make sure to share your progress photo’s on Instagram with the hashtag #HappyFlowerGardenQA
Or Post your photo’s in the Facebook Group!!
Welcome to Week 3 of our Happy Flower Garden Quilt Along! (Download Pattern) This week we will be making our Flying Geese.
I love using Flying Geese. You can make so many different designs using them. The benefit to using a Flying Geese instead of sewing 2 half square triangles together, is that you don’t have a seam down the middle of your pretty fabric! Less seams equals less sewing! Yay! Each time you make them they get easier and easier.
The Happy Flower Garden Pattern uses the 4 at 1 time no waste method and the 1 at a time method for construction. You can also download an additional PDF with your pattern that gives you the pieces you need to cut if you decide to make all your flying geese using the 1 at a time method or if you want to use half square triangles instead.
If you have never made the flying geese using the 4 at 1 time method or the 1 at a time method, you may want to try it out first on some scrap fabrics.
Tips for flying geese:
* Go slow when sewing for accurate seams.
* Make sure to read ALL the instructions and look at the diagrams closely
* Finger press your seams open before using your iron.
* Press seams without steam if possible (Dry iron)
* When Pressing, press down with out motion. Moving your iron around a lot can distort your flying geese
I will be filming a LIVE Video Tuesday May 15 th at 10:15 am PDT (West Coast USA) in the Facebook Group! I will be going over how to make your flying geese units and answering any questions you have. The video will be saved for later viewing.
May 1st – Week 1 – Cut your Fabric May 8th – Week 2 – Make your Half Square Triangles
May 15th – Week 3 – Make your Flying Geese units
May 22nd – Week 4 – Make your Bottom Rectangle Blocks
May 29th – Week 5 – Make half of your Tulip Blocks
June 5th – Week 6 – Make the other half of your Tulip Blocks
June 12th – Week 7 – Make your Corner Tulip Blocks
June 19th – Week 8 – Make your Star Flower Blocks
June 26th – Week 9 – Add Sashing and Cornerstones (Finish Star Flower Blocks if needed)
July 3rd – Week 10 – Baste, Quilt and Bind
Make sure to share your progress photo’s on Instagram with the hashtag #HappyFlowerGardenQA
Or Post your photo’s in the Facebook Group!!
The pattern will be 15% OFF through the end of the Quilt Along. If you still need your pattern you can download it by clicking below:
Welcome to Week 2 of our Happy Flower Garden Quilt Along!! This week we will be making ALL of our half square triangles.
When I make a quilt, I like to make all of the pieces need for all the blocks in the beginning. Then when it comes to making the blocks, they go together super quickly.
I like to make my Half Square Triangles with the 2 at 1 time method. If you have a different method you prefer, go for it! I like this method because all your finished edges will be straight grain and not on the bias.
To make the HST 2 at a time, I add 1 1/4 inch to the finished size HST.
I like to give you plenty of wiggle room for when you are trimming your HST down to the correct size.
TOOLS: Marking tool – I like to either use a disappearing ink pen made for fabric. Or a Hera Marker. A Hera Marker makes an indent in the fabric. You don’t have to worry about it washing out and it stays in the fabric for a while. Ruler – Any ruler will do. You will need this to mark out straight lines
You can find the size square you need to cut in your pattern (Download here)
IMPORTANT – You will need to then trim down all of your half square triangles to the correct size. You will want to make sure to line your center seam up with the 45 degree angle on your ruler to insure that your points line up when sewing.
I will be filming a LIVE Video Tuesday May 8th at 10:15 am PDT (West Coast USA) in the Facebook Group! I will be going over how to make your half square triangle and answering any questions you have. The video will be saved for later viewing.
May 1st – Week 1 – Cut your Fabric
May 8th – Week 2 – Make your Half Square Triangles
May 15th – Week 3 – Make your Flying Geese units
May 22nd – Week 4 – Make your Bottom Rectangle Blocks
May 29th – Week 5 – Make half of your Tulip Blocks
June 5th – Week 6 – Make the other half of your Tulip Blocks
June 12th – Week 7 – Make your Corner Tulip Blocks
June 19th – Week 8 – Make your Star Flower Blocks
June 26th – Week 9 – Add Sashing and Cornerstones (Finish Star Flower Blocks if needed)
July 3rd – Week 10 – Baste, Quilt and Bind
Make sure to share your progress photo’s on Instagram with the hashtag #HappyFlowerGardenQA
Or Post your photo’s in the Facebook Group!!
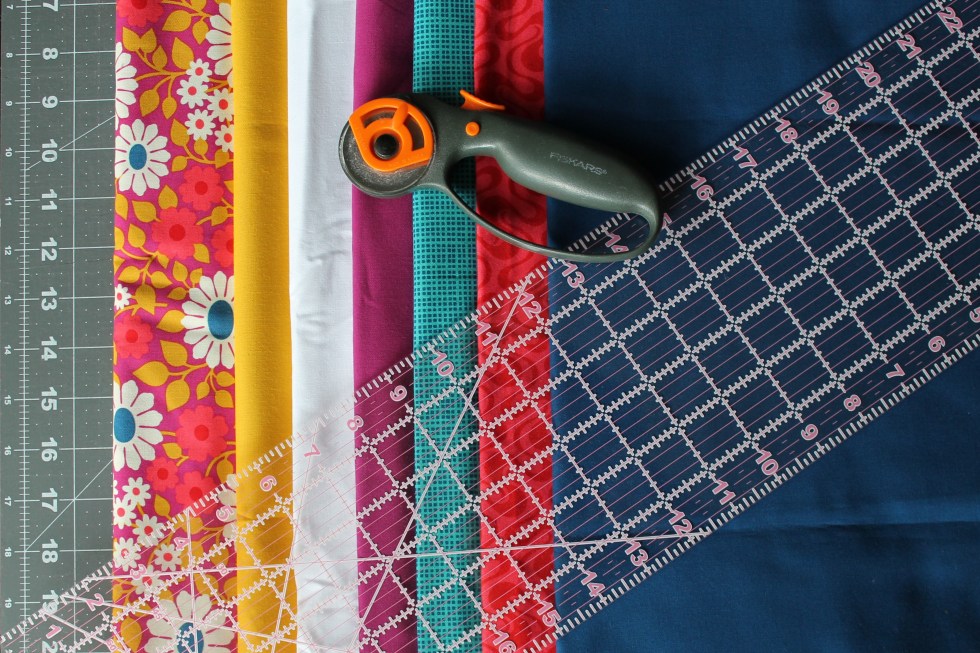
Yay! It’s the first week of the Happy Flower Garden Quilt along. It’s finally feeling like Spring here in Western Washington. The sun is shining and my flowers are starting to bloom.
This week of the quilt along we will be cutting all our fabric. I like to cut all my fabric before I start a quilt. This make the piecing go together quickly.
I don’t pre-wash my fabric…I know that’s a No-No… But since I stopped pre-washing, I’ve loved being able to dive right into a project. The fabric is still crisp, when you wash the no longer stiff. Also when you wash your fabric it will shrink and some times it will fray and you will loose some yardage. It also gives your finished quilt a nice crinkled look when it’s washed and dried. I like to throw a couple Shout Color Catchers in the wash when washing my finished quilt. This helps catch any loose dyes.
If you like to pre-wash your fabric, make sure to purchase a little extra to account for shrinkage!
Also, if you are using one of the alternative Flying Geese methods provided in the supplemental pdf. You will want to make sure to have a little extra fabric just in case.
Here is a Fabric Selection PDF you can print out. Cut your fabrics and tape/glue them to it!
*Get a NEW Rotary Blade (a dull blade makes it twice as hard to cut)
*Measure Twice and Cut Once
*Cut your largest pieces first, then cut the smaller pieces out
*Do NOT round up. Precise cutting is needed to make the 4 at 1 time no waste flying geese. So make sure to cut at the 3/8 or 7/8 marks (depending on what size you are making).
**If you may want to wait to cut your corner stones (Color E) and sashing strips until Week 9, but you can cut them now too! 🙂
I will be filming a LIVE Video Tuesday May 1st at 10:15 am PDT (West Coast USA) in the Facebook Group! I will be going over cutting your fabric and talk a little about the following weeks.
May 1st – Week 1 – Cut your Fabric
May 8th – Week 2 – Make your Half Square Triangles
May 15th – Week 3 – Make your Flying Geese units
May 22nd – Week 4 – Make your Bottom Rectangle Blocks
May 29th – Week 5 – Make half of your Tulip Blocks
June 5th – Week 6 – Make the other half of your Tulip Blocks
June 12th – Week 7 – Make your Corner Tulip Blocks
June 19th – Week 8 – Make your Star Flower Blocks
June 26th – Week 9 – Add Sashing and Cornerstones (Finish Star Flower Blocks if needed)
July 3rd – Week 10 – Baste, Quilt and Bind
I am so happy to be quilting along with you! I’m so excited to see your fabric picks!! Make sure to share your progress photo’s on Instagram with the hashtag #HappyFlowerGardenQA
Or Post your photo’s in the Facebook Group!!
The pattern will be 15% OFF through the end of the Quilt Along. If you still need your pattern you can download it by clicking below:
When I was designing this pattern, I was trying to create a Large block, when repeated would create an additional pattern. I also didn’t want it to have a lot of half square triangles or flying geese. I also wanted to use this stack of gorgeous Indah Batiks by Me + You Fabrics.
I decided to go with strip piecing, to make the blocks go together super quick. The pattern also includes the amount of squares needed if you decided not to go with strip piecing or make a scrappy version.
These are 21 inch finished blocks, so you only need 4 blocks for the baby size!
I wanted to keep the quilting simple on this one. So I marked out a line 1/2 inch from each seam (top to bottom). Then I quilted down the center, making all my quilting lines about 1 inch apart. I love quilting this close together, it gives the quilt great texture when washed and dried.
I went with the dark teal as the binding to tie in the center squares. I like to sew my binding to the front of the quilt and then hand sew it to the back.
The weather is finally cooperating here in Washington, so I was able to get a full quilt photo today. The only issue I had was the wind kept wanting to blow my quilt and holder over!
This pattern has instructions to make a baby, throw, queen and king size quilt!!
When posting pictures of your quilt on social media use the hashtag #sapphirelanequilt or #happycloudcreations I’d love to see your version!!
My Happy Flower Garden Quilt is one of my favorite quilts. It may be because this is the quilt I snuggle with on my couch. I love flowers and this is a great way to be around flowers year round.
I had posted a survey in my Quilt Along Facebook Group. Several people expressed interest in using this pattern for a Quilt Along! I think it will be a great quilt a long pattern, since it’s kind of a sampler quilt and it’s perfect for spring!
The original pattern only included a baby and throw quilt directions. I have recently updated my pattern to also include a queen and king size version.
I had ask my quilter followers if they prefer big block or more blocks of a smaller size. The answer was pretty 50/50. So when you purchase the pattern you will receive 2 pdfs. One is for a small block version and one is for a large block version. Here are the different layouts.
Most of the Flying geese in this pattern are made using the 4 at 1 time no waste method. With my last quilt along I noticed some of the participants were having trouble using this method. So I made a supplemental pdf that will give you cutting instructions so you can make all the flying geese using the 1 at a time method or half square triangle method. If you decide to use these alternative methods, I would recommend purchasing a little extra fabric just in case. The fabric requirements are for the piecing in the original pattern. These cutting instructions only replace the pieces used to make the flying geese. So you will need to make sure to omit cutting the piecing from the original pattern.
I asked in the quilt along group when the best start date for the quilt along would be and the final winning date was May 1st! So from now until May 1st, you can download your pattern and pick out your fabrics! Post pictures in the Facebook Group or on Instagram with the hashtag #happyflowergardenQAL
So here’s the quilt along schedule:
May 1st – Week 1 – Cut your Fabric
May 8th – Week 2 – Make your Half Square Triangles
May 15th – Week 3 – Make your Flying Geese units
May 22nd – Week 4 – Make your Bottom Rectangle Blocks
May 29th – Week 5 – Make half of your Tulip Blocks
June 5th – Week 6 – Make the other half of your Tulip Blocks
June 12th – Week 7 – Make your Corner Tulip Blocks
June 19th – Week 8 – Make your Star Flower Blocks
June 26th – Week 9 – Add Sashing and Cornerstones (Finish Star Flower Blocks if needed)
July 3rd – Week 10 – Baste, Quilt and Bind
I am so happy to be quilting along with you! I’m so excited to see your fabric picks!! Make sure to share your progress photo’s on Instagram with the hashtag #HappyFlowerGardenQAL
You can also join the Facebook Group and post your photo’s there! Join me in the Facebook Group today at 10:15 am PDT (West Coast USA) for a Live Video to go over the quilt along and fabric selection!
Wow! It’s already the last week of our Aloha Ripple Quilt Along! It has gone by so fast. Last week we put our quilt tops together, this week we will Baste, Quilt and Bind our quilts.
Basting Your Quilt: Spray baste: My favorite way to baste my quilt is by using Spray Baste! It makes basting so much easier. If you have allergies, this is probably not a good option for you.
Find a place where you can lay out your quilt. Make sure to tape the backing fabric taut to the floor (or large table).
Here’s great spray baste tutorial by Cluck Cluck Sew: Spray Baste Tutorial
Pin basting: You can use safety pin about 3 to 4 inches apart (about the width of your hand). I like to use the large curved basting pins. This takes a little longer than the spray basting, but is a great option.
Quilting your Quilt:
This step is totally up to you! I like to straight line quilt my quilt with my walking foot on my domestic machine. With my floral Aloha Ripple Quilt I quilted from the center out following the seams, so there was only about a 1/4 of the quilt in my sewing machine throat at a time.
Hand Tie your Quilt: Some prefer to tie there quilt.
Here’s a tutorial on how to do this on Craftsy.
Machine Quilt using your Walking Foot:
Emily Dennis from Quilty Love has a great tutorial on how to Zig zag quilt your quilt with a Walking foot. Click here I love this method of quilting, it give your quilt great texture.
Free Motion Quilting:
Free motion quilting can give you great texture and if you aren’t great at quilting straight lines, this would be great for you. Suzy Williams from Suzy Quilts has a great Free Motion Quilting Tutorial. Click here.
Binding Your Quilt: Binding is the fabric strip that goes on the edge of your quilt. It covers all of the unfinished edges and rounds out your quilt.
You will want to make sure to square up your quilt before you attach the binding. Cut off the extra batting around the edges and make sure your sides are straight.
One of my favorite binding tutorials is by Suzy Williams of Suzy Quilts. Go check it out!
Since I was using stash fabrics for my Baby size Aloha Ripple Quilt, I decided to go with a scrappy binding. I didn’t have enough of one color, so I used all the colors!
Join me LIVE!! If you have any questions, make sure to join me for my LIVE VIDEO. Today (Tuesday March 13th) at 10:15 am PST (West Coast USA) I will be filming a LIVE video in the Facebook Group to go over tips and answer any questions.
Make sure to share a photo of this weeks step on social media with the hashtag #AlohaRippleQAL or join the Facebook Group and post your photos!!
You can follow me on Instagram here: Instagram.com/HappyCloudCreations
You guys! All our blocks are done and it’s time to assemble our Quilt Tops! Yay! Cloud is even excited about it!! (See above, he loves to help!) If you are just finding this quilt along now, you can get the free pattern here!
If you had consistent seams and you pieces were cut accurately, everything will line up correctly.
Make sure to lay out your blocks in the correct order.
You will then match up (nest) the seams with the block next to each other. This is why we pressed our seams in specific ways. Now they will match up and interlock nicely.
I like to pin a lot! Pin next to each interlocking seam and then in between.
I like to work in rows. Sew the top three blocks together, the middle three blocks together and the bottom three blocks together so they form 3 rows. Then you nest your seams in the three rows, pin in place and sew them together! Wah Lah! I love how fast this quilt goes together.
Join me LIVE!! If you have any questions, make sure to join me for my LIVE VIDEO. Today (Tuesday March 6th) at 10:15 am PST (West Coast USA) I will be filming a LIVE video in the Facebook Group to go over tips and answer any questions.
Make sure to share a photo of this weeks step on social media with the hashtag #AlohaRippleQAL or join the Facebook Group and post your photos!!
You can follow me on Instagram here: Instagram.com/HappyCloudCreations
Welcome to Week 7 of the Aloha Ripple Quilt Along!! This week we will be making our last blocks! Can you believe it! This quilt along is going so fast!
We will be making 4 Stacked Flying Geese blocks. 2 of them will have 5 flying geese in them and 2 of them will have 6 flying geese in them.
Making your Stacked Flying Geese block:
First I like to layout all my flying geese in the correct order. Then I like to sew two flying geese together at a time, until you sew the whole row together. Make sure to press your flying geese block according to the arrows on the pattern! This will ensure that your seams nest when you go to sew all your blocks together next week.
2 of these blocks will have an additional flying geese sewn to the top! These blocks will go together super quickly!
If you have any questions, make sure to join me for my LIVE VIDEO. Tomorrow (Wednesday Feb. 21st) at 10:15 am PST (West Coast USA) I will be filming a LIVE video in the Facebook Group to go over tips and answer any questions.
Make sure to share a photo of this weeks step on social media with the hashtag #AlohaRippleQAL or join the Facebook Group and post a photo of your stacked Flying Geese blocks!
You can follow me on Instagram here: Instagram.com/HappyCloudCreations
Welcome to Week 6 of the Aloha Ripple Quilt Along! This week we will be making 2 of the Corner Block B. This block is a mirror of the block A. (Pattern)
If you made the corner block A already, this weeks blocks will be a breeze!
Tips for making your points line up:
*Accurate cutting of pieces
*Accurate consistent seam allowances
*Press your seams in an alternating direction once the rows are created so you can nest your seams
Making your Corner Block B:
I like to lay out all of my pieces next to my machine how they are in the pattern diagram.
The throw size pieces barely fit on my kitchen table next to my machine, but I make it work. I like to keep the pattern next to me as well, so I can make sure I am sewing them together correctly.
Then I chain piece the pieces together, starting with two squares from the first row, then two squares from the second and so on. Once I get to the last row, I start a adding one square from the first row, then second and so on. I keep doing this until all my rows are complete.
Once you have all your rows done, you will want to press your seams in alternating direction from the neighboring row (See pattern for pressing arrows, so that this block connects to your Flying Geese blocks correctly).
Then you will nest your seams together (butt them up against each other so they interlock). Pin them in place and sew! I like to keep my pins in when sewing even though it is a no no. It helps my pieces stay in the correct spot and helps your points line up correctly. Make sure to sew slowly over the intersecting seams. Yay! You’re Corner Block B is done!!
Yay! We only have 1 more week, then all of our blocks will be done!!
If you have any questions, make sure to join me for my LIVE VIDEO. Tomorrow (Wednesday Feb. 21st) at 10:15 am PST (West Coast USA) I will be filming a LIVE video in the Facebook Group to go over tips and answer any questions.
Make sure to share a photo of this weeks step on social media with the hashtag #AlohaRippleQAL or join the Facebook Group and post a photo of your Corner Block B!
You can follow me on Instagram here: Instagram.com/HappyCloudCreations
Starting January 2nd: Download Pattern – Select your fabric and post a photo! Week 1: January 16th: Cut fabric Week 2: January 23rd: Make the Flying Geese Week 3: January 30th: Make the Half Square Triangles Week 4: February 6th: Make the Center Block (1) Week 5: February 13th: Make Corner Blocks A (2)
Week 6: February 20th: Make Corner Blocks B (2)
Week 7: February 27th: Make the Stacked Flying Geese blocks (4)
Week 8: March 6th: Assemble your Quilt Top
Week 9: March 13th: Baste, Quilt and Bind your Quilt!


")


 My Sapphire Lane Quilt Pattern is now in my shop and ready for download!!


")
")

")
")
