I asked in my Quilt Along Group which pattern everyone would like to make next as a quilt along and the majority voted for my Frame It Quilt Pattern. I love the modern look of this pattern!
Get the Digital Pattern!
Printed Paper Pattern (USA)
Digital Pattern (International)
16 inch Blocks
Fat Quarter Friendly – includes cutting diagram!
Scrap Friendly!
Dates: February 12 – April 2, 2019!

This pattern will be released in my shop on Feb. 12 with two versions.
*Digital PDF download
*Printed Color PDF mailed to you (USA)
What you will get:
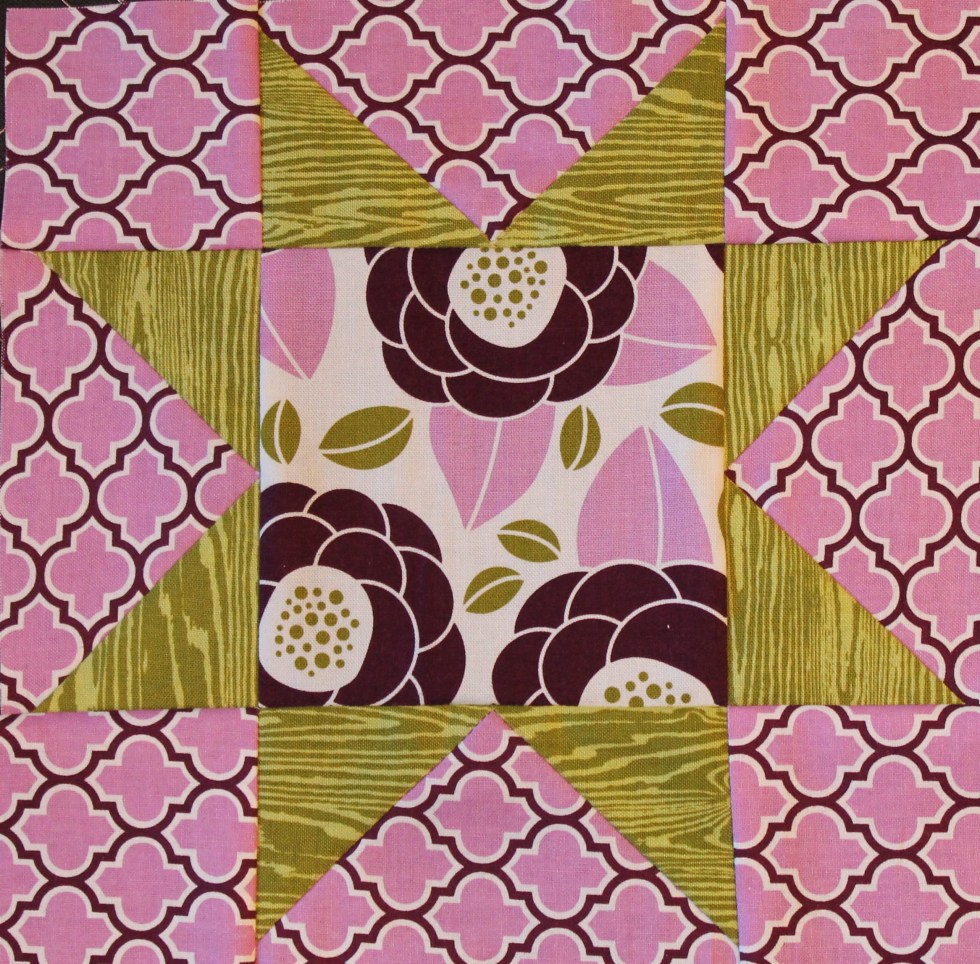
Both versions will come with the Main pattern and 2 supplementals. One supplemental will give you directions how to make the square in square blocks with Half Square Triangles. The second will give you directions how to make the square in square block with the Stitch and Flip method.
The main pattern uses triangles cut on the bias. So I thought I’d give these two other options for those that are worried about sewing triangles.
I found that if you are gentle with your fabric and sew slowly, you shouldn’t have a problem with sewing the triangles on the bias. For extra help you can starch your fabric before cutting.
Quilt Size: Throw – 56 x 74 inches (12 blocks)
I will be making the Throw size, but you can choose which ever size you would like and adjust how many blocks you will finish in weeks 5 – 7.
These sizes are also in the pattern: Baby (4 blocks), Twin (20 blocks), Queen (30 blocks) and King (36 blocks)
Quilt Along Schedule:
Feb. 12 – Week 1-2: Get Pattern and pick out fabrics
Feb. 26 – Week 3: Cut our pieces
Mar. 5 – Week 4: Make center units (Square in Square Block) (Step 1 – 4)
Mar. 12 – Week 5: Finish 4 Blocks
Mar. 19 – Week 6: Finish 4 Blocks
Mar. 26 – Week 7: Finish 4 Blocks
Apr. 2 – Week 8: Add sashing and Finish Quilt
Each week I will have a LIVE video to go over that weeks step and answer any questions you have! You will be able to view my LIVE videos in my Facebook Quilt Along Group: Happy Cloud Creations Quilt Alongs OR my Instagram.
After the video is done, I will upload it to my YouTube page for easy access!
How to Follow Along:
*Follow Along on Instagram with the hashtag #frameitqal
*Join the Quilt Along Group and post your progress photos with the group.
*I will post a blog post every Tuesday of the Quilt along and have LIVE video in the Facebook Quilt Along Group and on my Instagram Stories.
*You can sign up for my Newsletter to get weekly reminders!
Since I have received a lot of requests for the Fabric Requirements early, you can download them now! Make sure to decided which way you would like to make the blocks. The main pattern, half square triangle and stitch and flip versions all have slightly different fabric requirements.
If you like to pre-wash your fabric or if you are worried about miss cutting, but a little extra!
DOWNLOAD: Frame It Fabric Requirements
Download the Digital Pattern
Printed Paper pattern
I’m so excited to make this quilt with you all!!
Andrea
Here are some of my Testers versions!
Cindy Price Kelley

Marg Sharpe

Julie Anne Ricketts

Sheri Bing

Joanne Harris


")


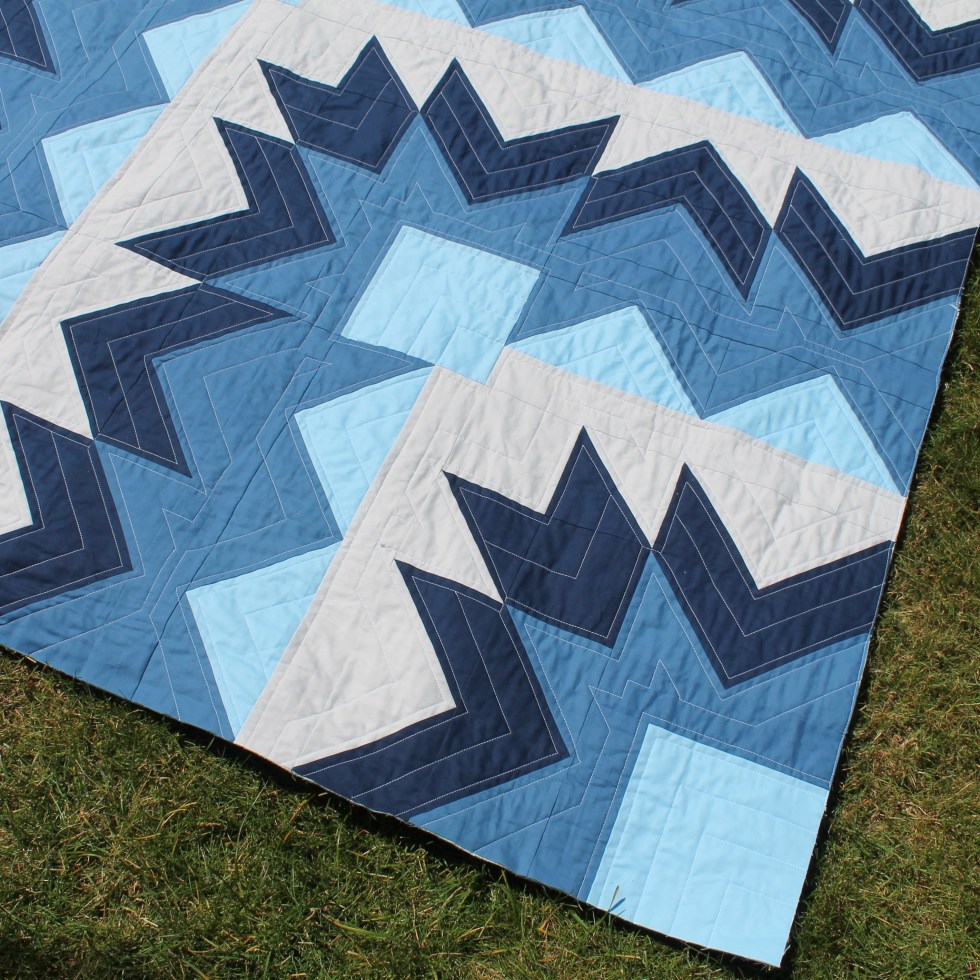
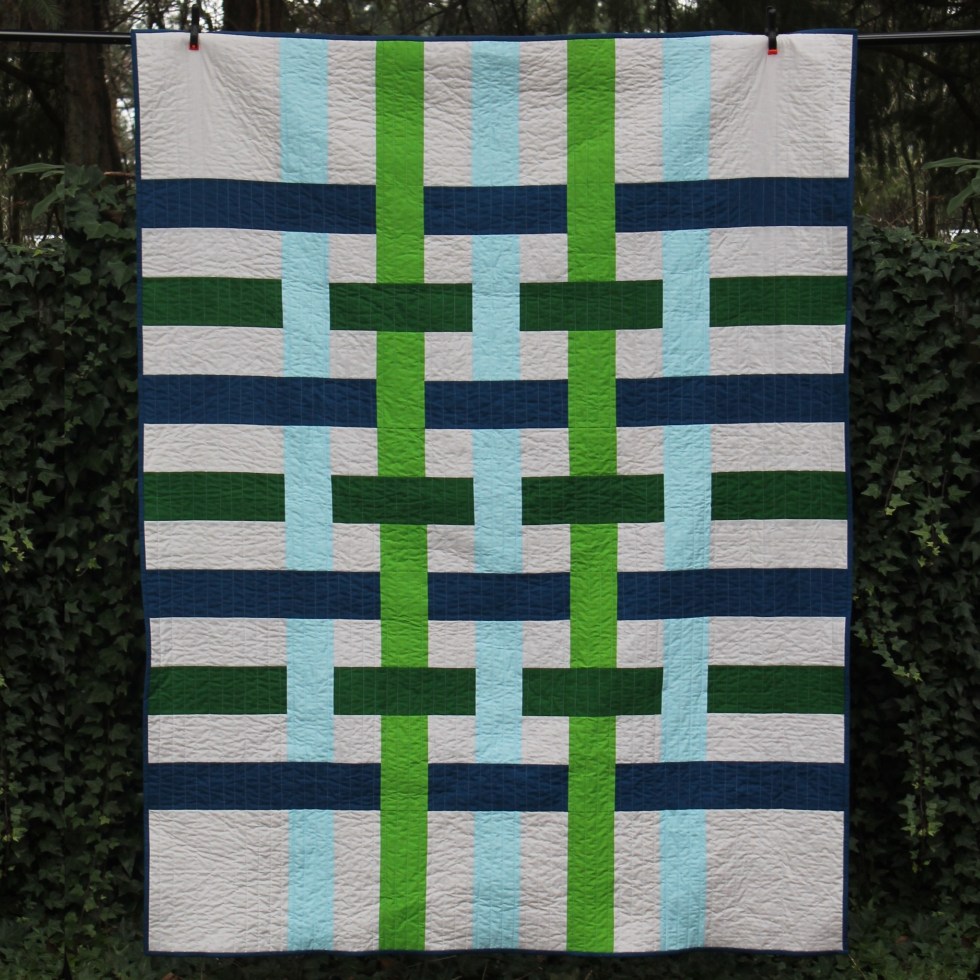 Yay! My Pacific Northwest Plaid Quilt pattern is all finished! I’m super happy with how it turned out! You can find this quilt pattern in my shop!
")
")


 2. Lay 1 small square (2 7/8 inch) down in the corner, right sides of fabric facing each other. Draw a line from one corner to the other diagonally. Sew a scant 1/4 inch from your drawn line. Cut down the center and press toward the small triangles. These geese should be 2 1/2 x 4 1/2 inches. Trim if needed.