This pattern would be considered good for an intermediate quilter. It has a lot of blocks and pieces to make and keep organized.
Week 5 – Make (1) of each: Block C, D, E, F, G and H.
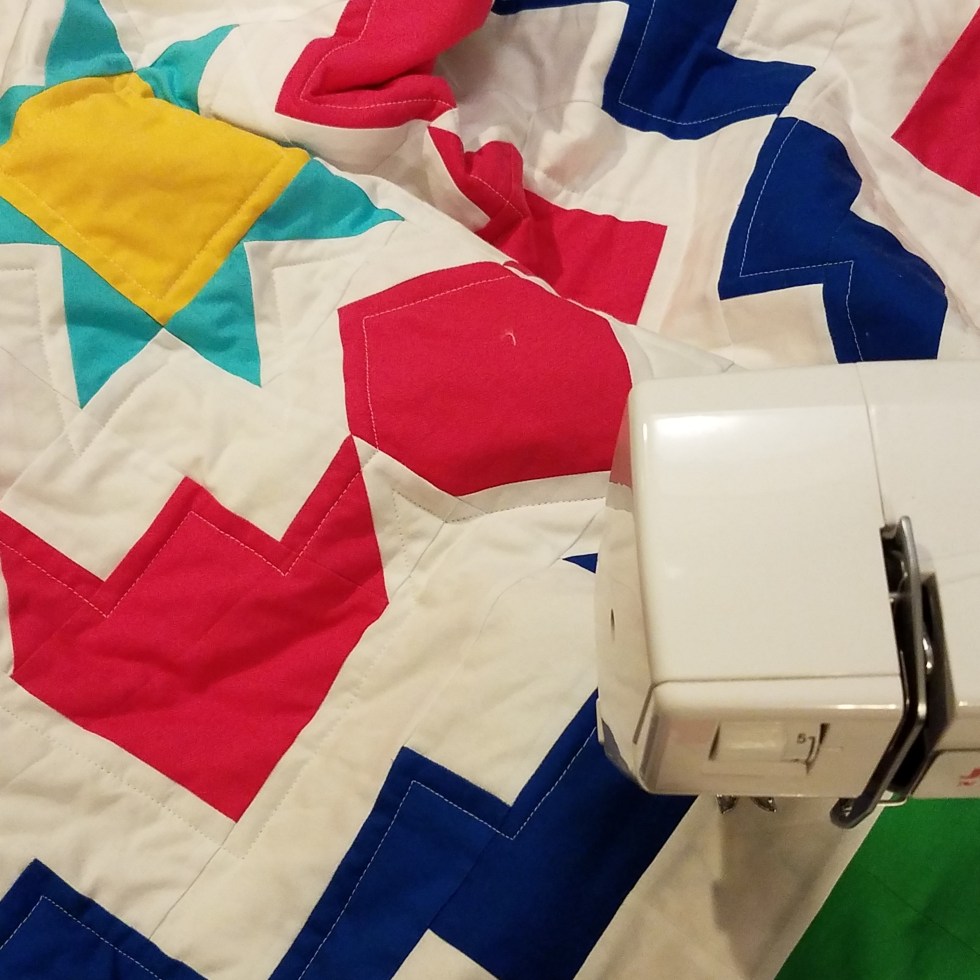
The week we will be making 6 blocks! These blocks are fairly easy and should go together quickly.
You will want to follow the color placement in the diagrams closely to ensure that your blocks end up correctly. I like to lay out my pieces exactly as shown and pin in place to make sure I am sewing the correct pieces together.
Also, make sure to measure after each step, to make sure your units are ending up the correct size.
I am loving seeing all of the progress photos!! Make sure to post a photo in the Facebook Quilt Along group or post one over on Instagram with the hashtag #InfiniteNightHelixQAL
JOIN ME! I will be filming a LIVE video in the Facebook Quilt Along group tomorrow (Wednesday Oct. 12th) at 11 am PDT to go over how to make Blocks C, D, E, F, G and H. I will also answer any questions you have. If you can’t watch it live, it will be saved to the group and be uploaded to my YouTube channel and will be placed in this blog post.
This schedule goes along with the larger sizes of the quilt pattern. If you would like to make the baby size, you will skip Blocks E thru N and go to Blocks O & P.
This pattern would be considered good for an intermediate quilter. It has a lot of blocks and pieces to make and keep organized.
Week 4 – Make (1) Block A and (2) Block B
Now that we have a bunch of units made, it’s time to start making blocks! This week we will be making (1) Block A and (2) Block Bs.
These blocks should go together pretty quickly, since the harder units have already been made.
As you are working your way through this pattern, it’s important to take note of color placements listing in the diagrams. Also, check the size of your units after each step to make sure they match up with the size listed.
I’m excited to see your blocks come together! Make sure to post a photo in the Facebook Quilt Along group or post one over on Instagram with the hashtag #InfiniteNightHelixQAL
JOIN ME! I will be filming a LIVE video in the Facebook Quilt Along group tomorrow (Wednesday Oct. 5th) at 11 am PDT to go over how to make the Block A and Block B. I will also answer any questions you have. If you can’t watch it live, it will be saved to the group and be uploaded to my YouTube channel and will be placed in this blog post.
This schedule goes along with the larger sizes of the quilt pattern. If you would like to make the baby size, you will skip Blocks E thru N and go to Blocks O & P.
This pattern would be considered good for an intermediate quilter. It has a lot of blocks and pieces to make and keep organized.
Week 3 – Make Large Arrow units, Diamond in Square and Diamond in Rectangle units.
This week we will be making some more units. These units are used in several of the blocks, so I like to make them ahead of time, so the blocks will go together super quick when we start to make them.
These units will all use the ‘Stitch and Flip’ method that is used in a 1 at a time Flying Geese block.
Once you’ve finished make sure to snap a photo and share in the Facebook Quilt Along group or on Instagram with the hashtag #InfiniteNightHelixQAL
I’m so excited to see your quilt come together! There are a few quilters in the Facebook quilt along that decided to work ahead and are almost finished with their quilts. They are looking SO beautiful!!
JOIN ME! I will be filming a LIVE video in the Facebook Quilt Along group tomorrow (Wednesday Sept. 28th) at 11 am PDT to go over how to make the Large Arrow units, Diamond in Square and Diamond in Rectangle units. I will also answer any questions you have. If you can’t watch it live, it will be saved to the group and be uploaded to my YouTube channel and will be placed in this blog post.
This schedule goes along with the larger sizes of the quilt pattern. If you would like to make the baby size, you will skip Blocks E thru N and go to Blocks O & P.
This pattern would be considered good for an intermediate quilter. It has a lot of blocks and pieces to make and keep organized.
WEEK 1 – CutPieces
This week will be cutting our fabric for the quilt. Typically, I prefer to cut out the whole quilt first, so you don’t have to worry about doing it later. With this quilt, I chose to wait to cut the Color D ‘Pieces around blocks’ and the ‘Top, Bottom and Side borders’ until all my blocks are completed. Since I won’t be using them for a very long time.
You will want to wait to cut the Color D ‘Pieces around blocks’ and the ‘Top, Bottom and Side borders’ especially if your blocks don’t always end up the correct size. Then you can adjust these pieces to be the same size as your blocks.
If you make sure all your units are measuring the correct size throughout making the quilt, your blocks should end up the correct size. And you don’t have to worry about waiting to cut those pieces.
If you are making a scrappy version, you may want to cut out 1 block at a time.
I wrote the pattern using the 4 at a time flying geese method. Then I decided to add a ‘supplemental’ that includes two alternative ways to make your flying geese, in case you hate the 4 at a time method. These methods are on the very last page of the pattern. You can substitute the 4 at a time pieces (indicated with a FG in the cutting instructions) with the pieces listed on the supplemental.
Tips for cutting your fabric: *Make sure to press all of your fabric before cutting. This will help ensure all of your pieces are cut correctly. You don’t want to accidently have a wrinkle in a piece. *Cut out your larger pieces first, then cut out the smaller ones. This helps you conserve your fabric. *Cut all of your fabric with the same brand of rulers. If you are using multiple rulers, they can vary from brand to brand and may not be the same. So, I like to stick to one brand.
QUILT ALONG SCHEDULE Aug. 23rd – Grab your pattern & Pick out fabrics! Sep. 13th – Week 1 – Cut Pieces Sep. 20th – Week 2 – Make Flying geese & Small Arrow units Sep. 27th – Week 3 – Make Large Arrow units, Diamond in Square & Diamond in Rectangle units. Oct. 4th – Week 4 – Make Blocks: (1) A and (2) B Oct 11th – Week 5 – Make Blocks: (1) of each C, D, E, F, G & H Oct 18th – Week 6 – Make Blocks: (2) I & 4) J Oct 25th – Week 7 – Make Blocks: (4) K & (4) L Nov. 1st – Week 8 – Make Blocks: (2) M & (2) N Nov. 8th – Week 9 – Finish our quilts!
This schedule goes along with the larger sizes of the quilt pattern. If you would like to make the baby size, you will skip Blocks E thru N and go to Blocks O & P.
HOW TO PARTICIPATE Join my Facebook group and post your weekly progress photos OR post your photos on Instagram with the hashtag #InfiniteNightHelixQAL or Tag me in your photo!
Grag the pattern, pick the size you want to make. The pattern comes with directions for a Baby (44 x 56 in), Throw (64 x 80 in), Twin (72 x 90 in), Full (80 x 100 in), Queen (88 x 110 in), and King (105 x 110 in).
JOIN ME! I will be filming a LIVE video in the Facebook Quilt Along group today (Tuesday Sept. 13th) at 10:30 am PDT to go over cutting our fabrics and to answer any questions you have. If you can’t watch it live, it will be saved to the group and be uploaded to my YouTube channel and will be placed in this blog post.
We are starting the 7th week of working on our unfinished quilts. I’m so happy I’m getting some of my older quilts finished. I can’t believe I only have 2 left on my list! Have you made some time to work on your older unfinished quilts?
You can download the FREE Quilt Project tracker here:
My goal was to work on my Stepping Stone quilt! I finished the top, basted and started quilting this 85 x 85 inch quilt. I realized this is the largest quilt I’ve made so far.
So I decided to quilt it with straight lines diagonally, both directions to make a criss-cross pattern. I used my Hera marker to mark out my lines, using the squares and the 45 degree line on my ruler to help mark out my lines.
This was my first time quilting diagonally, and I’m loving how it’s turning out. It’s keeping very little bulk in my small throat machine.
THIS WEEKS GOALS:
This week my goal is to finish quilting this Stepping Stone quilt and start working on the binding! I actually made the binding strips last week. So I’ll be all ready to bind when I’m done quilting.
I’m also hoping to cut out the fabric for my Next Quilt Pattern! I had purchased a ton of these Atrium fabrics by Joel Dewberry, when purchasing fabrics for my daughters twin size quilt. I made it a few years back. I’m really trying to use up my fabric stash this year, so I think these will work perfectly. You can make this new pattern with 6 main colors and a background or it’s Fat Quarter(or 1/3 yard cut) friendly.
HOW TO JOIN
Print the project tracker
List all of your unfinished quilts on the project tracker
post your weekly progress in the Facebook Group or on Instagram with the hashtag #FinishThoseUFQs2021
It’s week 6 of the Finish Those UFQs challenge! How’s your listing going? I hope you are making some progress. I’m really surprised with how much I’ve already finished!
You can download the FREE Quilt Project tracker here:
My goal was to finish quilting and bind my Starlight Mountains quilt! I’m happy to say, this quilt is all finished! I started this quilt during the quilt along in September of 2020. This is a FREE quilt pattern, you can find it HERE!
I quilted this one from top to bottom in a organic straight line 2 inches apart. I used a Warm and White cotton batting, since the quilt has so much white in it.
I found a super cute cotton dot sheet set at Target. It goes perfectly with the top. Then I bound it in a tiny black with with dot fabric. I love how this one turned out!
THIS WEEKS GOALS
I only have 2 quilts left on my list! Woohoo!! I plan on working on my large sized Stepping Stone quilt. I made 4 of the baby size quilts. I plan on sewing them together with strips of fabric. I had started working on this quilt in December of 2016. This is going to be a family snuggle quilt for our couch. It has cloud fabric for my son Cloud and snowflake fabric for my daughter Snow.
Then I am hoping to also baste this quilt and start quilting it.
HOW TO JOIN
Print the project tracker
List all of your unfinished quilts on the project tracker
post your weekly progress in the Facebook Group or on Instagram with the hashtag #FinishThoseUFQs2021
We are starting the 3rd week of the Finish Those UFQs 2021 challenge! Did you make any progress on your list? It’s not too late to download the FREE quilt project tracker and get working on some older quilts!
LAST WEEK My goal was to work on my baby size Plaid’N Perky Quilt! I’m so excited to check to some boxes off my listed. I finished the binding on this one last night! So I still need to get a full photo of it outside sometime today. On my last LIVE video in the Facebook Quilt Along group, you all helped me pick the navy colored binding. I love how it turned out!
This quilt was made using fabric from the Wander collection by Joel Dewberry for FreeSpirit Fabrics.
THIS WEEKS GOAL
My goal this week is to get the backing ready, baste and quilt this baby size Joyful Meadows Quilt. I made this top during the Joyful Meadows Quilt along earlier this year. I plan on echoing the design with the quilting. So this will take more time than the quilting on my Plaid’N Perky quilt.
HOW TO JOIN
Print the project tracker
List all of your unfinished quilts on the project tracker
post your weekly progress in the Facebook Group or on Instagram with the hashtag #FinishThoseUFQs2021
JOIN ME for the LIVE Check in Chat over in my Happy Cloud Creations Quilt Along Group at 7 PM PDT on Tuesday May 4th. I’ll add the video to this blog after it’s been filmed.
Finish Those UFQs 2021 Challenge schedule: April 27th – Week 1 – Write out your list May 4th – Week 2 May 11th – Week 3 May 18th – Week 4 May 25th – Week 5 June 1st – Week 6 June 8th – Week 7 June 15th – Week 8 June 22nd – Week 9 June 29th – Week 10
It’s been 1 week since we started the Finish Those UFQs 2021 challenge! Did you download the FREE Quilt Project tracker? Did you write a list of all the quilts you want to finish? Did you make any progress on your list?
You can download the tracker here if you haven’t yet:
My goal last week was to finish hand sewing the binding on my KaBam Quilt. I had started making this quilt in March 2020. Once the top was finished, I got sidetracked with new quilt projects. Then I was trying to finish it during the 2020 Finish Those UFQs challenge….but I got side tracked when the Joyful Meadows quilt along got started and never finished sewing the binding on. I’m happy to say I finally finished this one! Yay!!
THIS WEEKS GOAL
My goal is to baste and quilt my baby size Plaid’N Perky Quilt. I think this one would look good with straight line, top to bottom quilting. This is how I quilted my throw size. This will go pretty quick, so maybe I’ll be able to start working on the binding also.
HOW TO JOIN
Print the project tracker
List all of your unfinished quilts on the project tracker
post your weekly progress in the Facebook Group or on Instagram with the hashtag #FinishThoseUFQs2021
JOIN ME for the LIVE Check in Chat over in my Happy Cloud Creations Quilt Along Group at 7 PM PDT on Tuesday May 4th. I’ll add the video to this blog after it’s been filmed.
Finish Those UFQs 2021 Challenge schedule: April 27th – Week 1 – Write out your list May 4th – Week 2 May 11th – Week 3 May 18th – Week 4 May 25th – Week 5 June 1st – Week 6 June 8th – Week 7 June 15th – Week 8 June 22nd – Week 9 June 29th – Week 10
I’m excited to see how much progress we can make!! Happy Quilting! Andrea
I have been thinking about what I should work on next. I just finished releasing my Plaid’N Perky Quilt Pattern. I had thought about doing another quilt along in the group, but my kids are staying home and doing remote learning for the rest of this school year. I decided I don’t think I will have the time or energy to host a quilt along.
I really want to be productive this Spring and Summer. So I thought to motivate me and motivate you, we could do an early ‘Finish those UFQs’ Spring Summer edition! I usually do one of these in November. But I thought it may be fun to do it early this year.
I’m sure I’m not the only one needing to work on some older projects! So, download the FREE Project tracker and join in the fun of finishing some quilts! If you still have your project tracker from the last Finish Those UFQs, you can keep working on that. Or you can download this new one that now has a spot for ‘Backing Ready’.
List all of your unfinished quilts on the project tracker
post your weekly progress in the Facebook Group or on Instagram with the hashtag #FinishThoseUFQs2021
Each week I’ll share a blog post and jump on a LIVE video in the group to share my progress with you and chat!
I’m excited to see how much progress we can make!! Happy Quilting! Andrea
Finish Those UFQs 2021 Challenge schedule: April 27th – Week 1 – Write out your list May 4th – Week 2 May 11th – Week 3 May 18th – Week 4 May 25th – Week 5 June 1st – Week 6 June 8th – Week 7 June 15th – Week 8 June 22nd – Week 9 June 29th – Week 10
Here is my list so for now, from oldest to newest! I’m still debating which one I will work on first.
Stepping Stone Quilt – I made 4 of the baby size quilts and plan on sewing them together. This was supposed to be a family snuggle quilt for the couch. So I put Cloud fabric and Snow fabric in it. It also needs to be basted, quilted and bound
This post may contain Affiliate Links. When using the link, you pay the same amount for the items, I just receive a small commission.
Welcome to the last week of the Joyful Meadows Quilt Along! I can’t believe this quilt along is already finishing up. It has been so much fun quilting with you all! Thank you all for joining in the fun!
LIVE VIDEO
Join me tomorrow, Feb. 24th at 9 am PST (West Coast USA) for a LIVE video in my Facebook Group to go over Week 7 – Putting our quilt top together, Basting, Quilting and Binding our quilts!
You can watch this in my Facebook Group! If you can’t make it LIVE, that’s ok! I will save it to the Facebook group and upload it to my YouTube channel!
GRAB THE PATTERN! This quilt pattern will be 10% OFF thru the end of the quilt along (March 2nd)
Things you will need: Backing Fabric (at least 6 inches wider and longer than your quilt top) Quilt Batting (at least 6 inches wider and longer than your quilt top) Basting Spray or Basting Pins Binding Fabric These are helpful but not necessary: Hera Marker to mark out your quilting lines Walking Foot (Helps pull your quilt from both the top and the bottom)
Finishing our Quilts!
Quilt Sandwich: First you will need to make your Quilt Sandwich. You will need to cut and sew your backing fabric to make it fit under your quilt correctly. Make sure it is at least 3 inches wider than your quilt top on all sides (quilt top size + 6 inches). Trim your selvage edge off after joining your pieces.
Make your quilt sandwich by first laying down your quilt backing, wrong side facing up. Tape down to a hard surface, making fabric taut. Next lay your batting on top. Smooth out with your hands, do not stretch. Then lay your quilt top right side up, smooth out with your hands.
There are so many different types of batting. I really love the Warm Company products! I have been using the Warm and Plush a lot lately because it is a little thicker than the Warm and Natural and the Warm and White cotton battings.
Basting Your Quilt:
Spray baste: My favorite way to baste my quilt is by using Spray Baste! It makes basting so much easier. If you have allergies, this is probably not a good option for you. I’ve tried several different types of spray baste. Some are better than others. I love the Sulky temporary spray, it is low odor and doesn’t give you much overspray at all. But you need to make sure you will be quilting it in the next few days because the spray disappears in 2-5 days. 505 Temporary adhesive spray has come highly recommended by several quilters to me. I ran out and didn’t have any for this project. It has great stickiness without being overly sticky. I love that it does not get all over the place like some other sprays I have used. I will definitely be using this spray again. Find a place where you can lay out your quilt. Make sure to tape the backing fabric taut to the floor (or large table). Here’s great spray baste tutorial by Emily Dennis of Quilty Love. Spray Baste Tutorial Morgan Kelly has a great table top spray basting tutorial on her Instagram. Table Top Spray Baste Tutorial
Pin basting: You can use large curved safety pin about 3 to 4 inches apart (about the width of your hand). I like to use the large curved basting pins. This takes a little longer than the spray basting, but is a great option.
Quilting your Quilt: This step is totally up to you!
For my original quilt I used my foot and outlined the design lining my walking foot up with the seams of the design. Since I made the baby size and my batting says I need to be at least 6 inches apart, I didn’t need to mark any lines out. I just used the seams, which made it really quick and easy.
Hand Tie your Quilt: Some prefer to tie there quilt. Suzy Quilts has an cool way of tying quilts. Check out her Tutorial!
Hand Quilt: Here’s a wonderful video tutorial by Suzy Quilts all about How to Hand Quilt.
Machine Quilt using your Walking Foot: Emily Dennis from Quilty Love has a great tutorial on how to Zig zag quilt your quilt with a Walking foot. Click here I love this method of quilting, it give your quilt great texture.
Free Motion Quilting: Free motion quilting can give you great texture and if you aren’t great at quilting straight lines, this would be great for you. Suzy Williams from Suzy Quilts has a great Free Motion Quilting Tutorial. Click here.
Binding Your Quilt:
Binding is the fabric strip that goes on the edge of your quilt. It covers all of the unfinished edges and rounds out your quilt.
You will want to make sure to square up your quilt before you attach the binding. Cut off the extra batting around the edges and make sure your sides are straight and corners are squared.
Most quilters will cut 2 /12 inch by width of fabric strips and then sew them together at the ends at a diagonal. Then press the strip in half, so that you are wrapping 2 layers of fabric around all of your edges.
You can machine sew the binding to the front of your quilt and wrap it around to the back and hand stitch it down. Or some prefer sewing the binding to the back of the quilt, wrapping it around to the front and machine stitching it down.
One of my favorite binding tutorials is by Suzy Williams of Suzy Quilts. Go check it out!
I’m so excited to see everyone finished quilts! Make sure to post them in the Quilt Along Group on on Instagram with the Hashtag #JoyfulMeadowsQAL